Tips and tricks for taking before and after photos
Before and after pictures are an important part of working in the beauty industry. They show off your talents as an artist, stylist, skin care expert etc. in a fun (and sometimes seemingly magical) way. But, in order for your photo to make a positive impact, there are just a few things to consider before snapping that picture and posting it online. Read on to discover how to create the per“Tricks” of the Trade
“Tricks” of the Trade
All in the Eyes
The most common before and after images we see are taken of the eye area … why is this? One reason is because the eye area is easiest to manipulate. A simple change of humidity in the room, or application of plain glycerin to the skin will create a more visually smooth and plumped up skin texturefect before and after shot!
Filters and Flash
As you peruse before and after photographs, take note of shadows in the images – do the befores have more shading under the neck or eye area than the afters?
One of the easiest ways to create a “visual change” in before and after photography is the use of different filters or flash settings on your camera. It is especially easy to change the way a person looks simply by adjusting the flash setting. For example, using a polarized light source setting will accentuate fine lines, wrinkles and pore size, while using a flash setting with flat lighting will “magically smooth” those features (*see example B). Going from cross-polarized to flat-light setting will make pigmentation less visible. Other types of lighting will accentuate shadows, depending on whether the flash comes from above, below or the sides of the image. This is why it is important to document and use the same flash setting each time a picture is captured.
Facial Expression
Smiling or frowning in the before picture will definitely enhance an after image taken with no expression on the face. Expression lines around the eyes and mouth, or forehead wrinkles are difficult to imitate each time in photographs. Even a faint lift of the brow or corners of the mouth can make a difference. For most of us, it is second nature to smile when having our photograph taken, but this is one time our look should remain completely relaxed and neutral. In high school, we called it “elevator face” in reference to how serious everyone looks when riding in an elevator. A neutral expression, with closed eyes and mouth, is much easier to replicate each time.
If you are capturing images of Botox or Dysport treatments, your client should take the first picture with neutral expression first, then expression lines second. It is harder to show the face completely relaxed after making expression lines.
Positioning
Keeping the same positioning during each photography session is important, as facial features can change with even slightly different poses (*see example C). If the focus is on wrinkles or facial sagging, the photo should not be taken with the client lying down, as gravity influences which way the skin moves. As well, the distance from client to camera lens should always be the same.
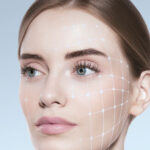
To help ensure that you capture the same angle each time, some imaging systems make it possible to show the original face outline under the current pose. Software packages for computer imaging systems are also able to adjust angles or colors if the before and after photo doesn’t match up correctly.
Using Makeup and Other Enhancements
Changes to jewelry, hair color or style, or injections such as Botox and/or fillers can all make an after image appear more impressive. Make sure your client has a completely clean face (especially no sunscreen, for UV image accuracy) for each photo session. Try to take the photo at least 20 minutes after cleansing, as hydration from water can visibly affect pore size and wrinkling to a degree. Communicate your policy on the use of Botox or other enhancements during the study period, especially if it will change the image outcome differently than just your protocol alone.
Time Between Before and After Shots
As you are flipping through impressive looking pages of before and after images, note the length of time indicated from the first before photo to the after photo. Is it consistent throughout all the images, or does the length of time switch around from weeks to months or years? For example, are the photos going from an 8-week span to an 8-month span, then back to a 16-week span? It is important to distinguish the length of time.
Before & After Success Tips
Photography Area
If you are planning on tracking before and after progress with your clients, it is helpful to designate a specific room or space for taking before and after photos. It is simple to start out with a good digital camera that is able to take high resolution photography.
Look for equipment that is capable of taking images with a minimum resolution of 72 dots per inch (dpi), which is appropriate for reproducible quality for internet images or slideshow presentations. Marketing brochures and other print media will need at least 300 dpi resolution. Decide if you will be taking pictures with the flash on or off, and keep the same setting throughout the series. As well, make sure the overall lighting in the room is always the same. For example, if the space has windows with changing sunlight, be mindful of shadows and room lighting at different times of the day. A simple, light to medium blue background works best to provide contrast with skin tones. Mark a spot so patient is always in the same spot. Double check facial positioning from the before image and try to replicate as best as possible. Be sure hair is pulled off the face each time, using a neutral-colored simple headband if necessary, and remove distracting jewelry.
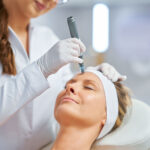
Computer Imaging Systems
One of the most significant investments you can make for your practice is purchasing a computer imaging system with a dedicated camera booth. This type of technology offers several choices in filters for photographs, which allow you to illustrate fine lines and wrinkles, photodamage, skin texture, vascularity, skin color clarity/evenness and certain types of skin bacteria.
Computer imaging systems make it possible for you to focus on a certain area of the face for analysis data as well. Analysis of your before and after photos can either be subjective (where you can visibly see a change) or quantitative (using actual number data, such as counting porphyrin bacteria, pigmentation spots, or number of wrinkles or pores). Some systems include software that will enable you to provide pre-programmed written recommendations for skin rejuvenation procedures along with cosmeceuticals for each individual client.
Photography Release Forms for Safety
For clients who agree to let you photograph their progress, it is important that he or she has the option to allow you to use their images in your marketing pieces. There are sample photography consent forms widely available on the internet to help you with the wording.
Read More…
-

The Client Experience Blueprint
31 March, 2026 -

From Posting to Profit
31 March, 2026 -

Building Stronger Businesses Through Strategic Partnerships
31 March, 2026 -

Trending Ingredients 2026
28 February, 2026 -
The New Age of Skin Science
28 February, 2026 -
The Art of the Stack
28 February, 2026 -

Post – Procedure Skin
28 February, 2026 -

Understanding Menopausal Skin
31 January, 2026 -

The Over-Exfoliation Epidemic
31 January, 2026 -

The Algorithm vs. The Expert
31 January, 2026